
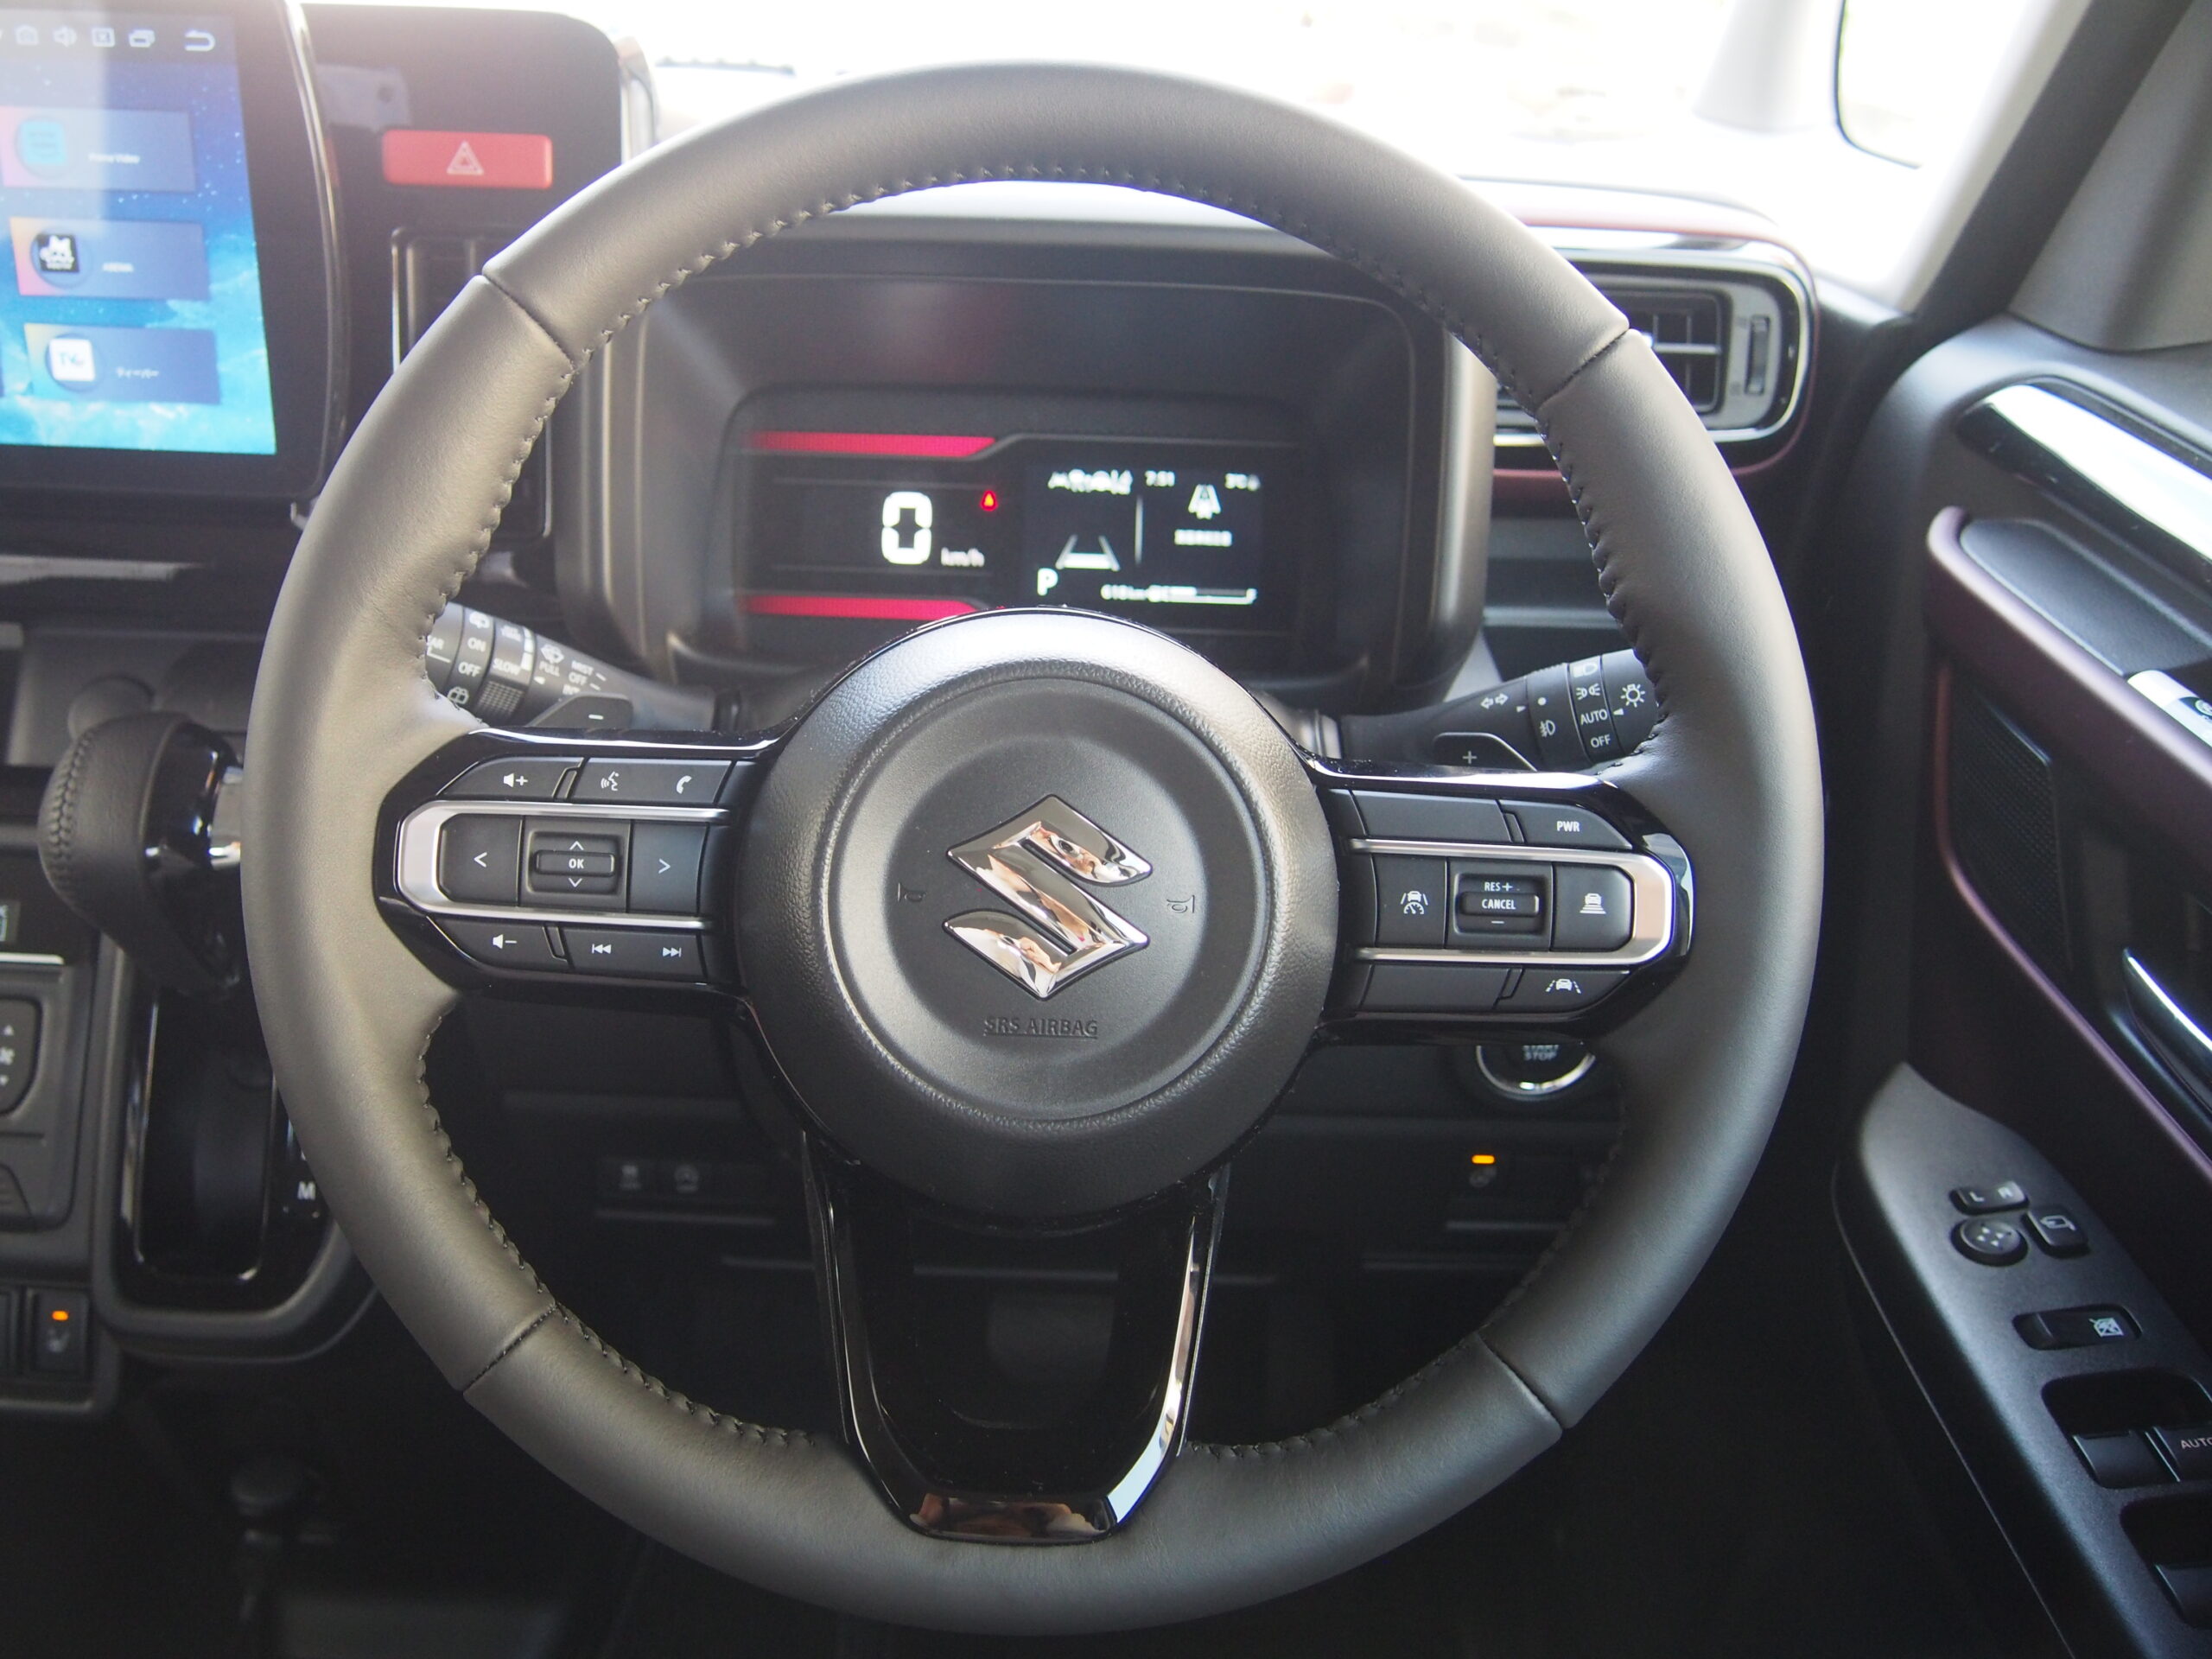
社外ナビで、ステアリングスイッチの配線を繋いだのに使えない。
そんな方に、カンタンに配線の繋ぎ方教えます。
 nekoto
新型スペーシアに関するDIYなどを更新していこうと思うので、気になる方はページ下のリンクから飛んでください。
目次
配線はこう繋げ
簡単に説明します
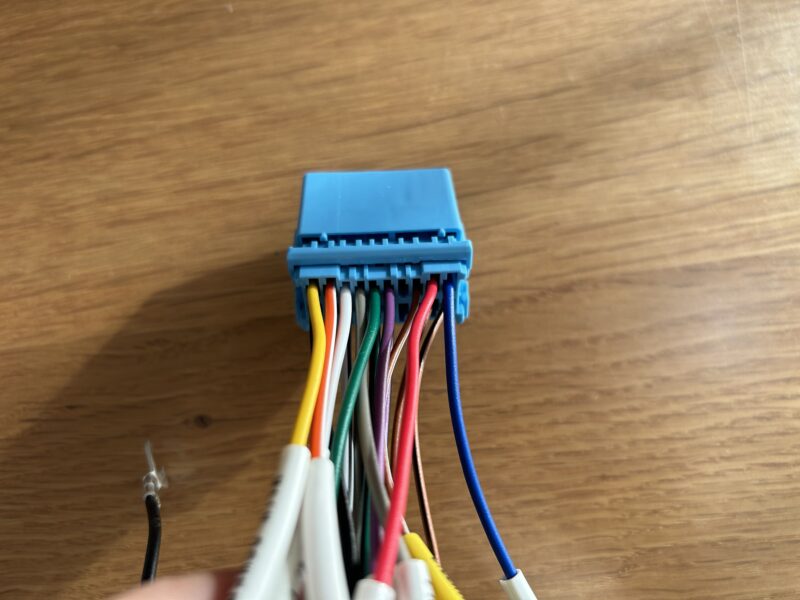
画像にて
イラスト
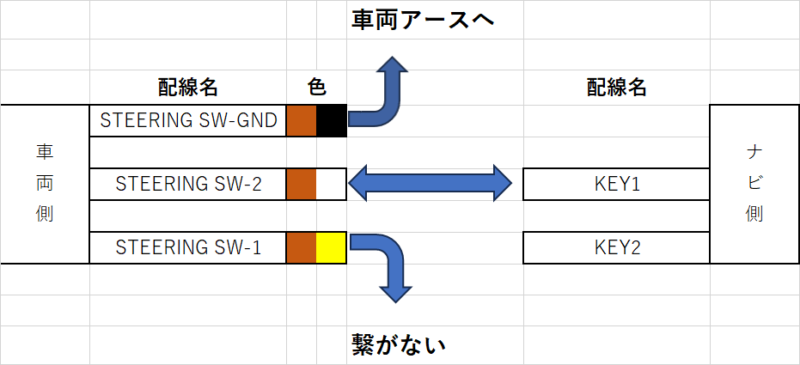
上記イラストは、ステアリングスイッチの部分だけわかりやすくしました。
簡単に説明すると、上記のように接続してもらえれば、使用できました。
エーモンの配線名の騙されて、そのまま繋いでも使えませんでした。
nekotoちなみに私のナビは、STEERING SW-2をKEY1の代わりKEY2に繋いでも使用できました。
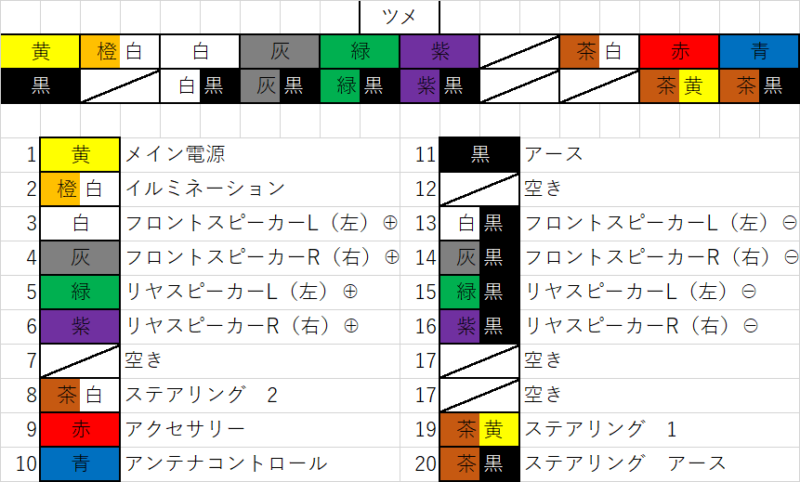
車両側の配線図
スズキのディーラーから頂いた配線図になります。
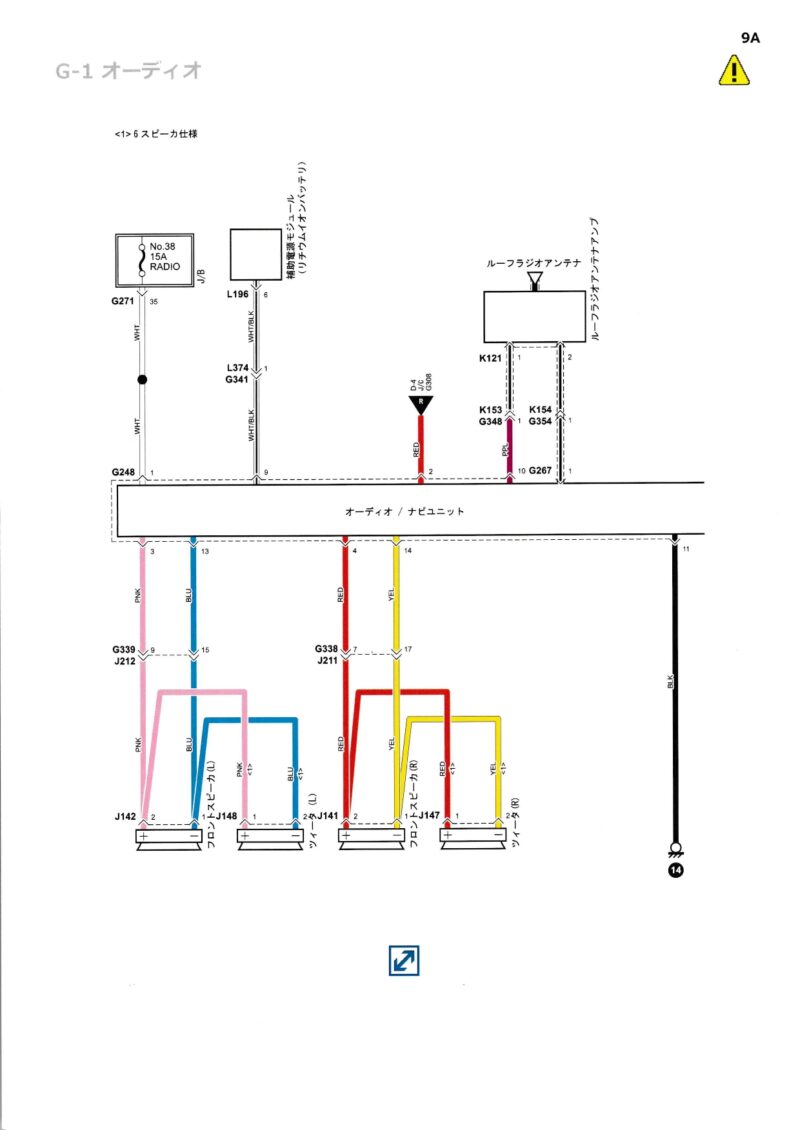
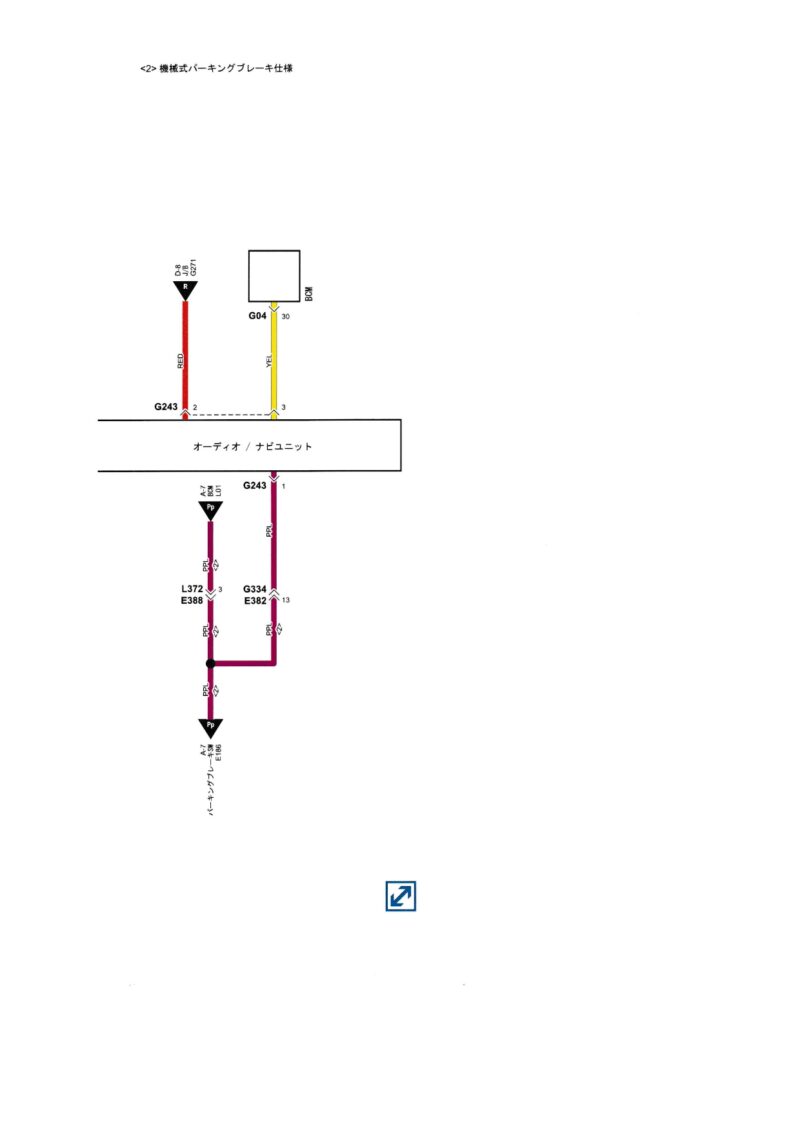
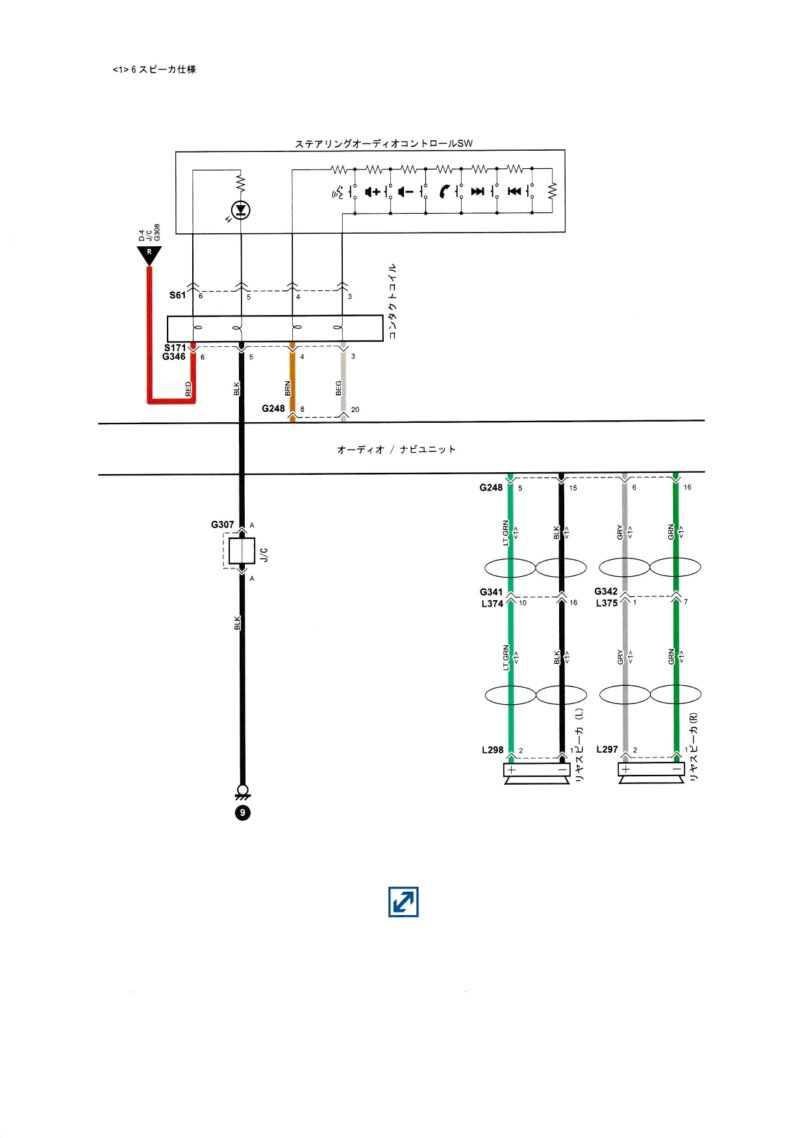
見やすくしました
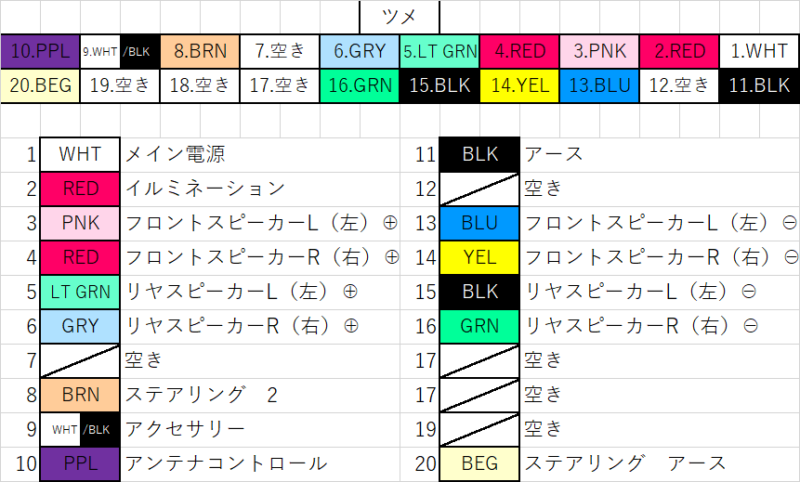
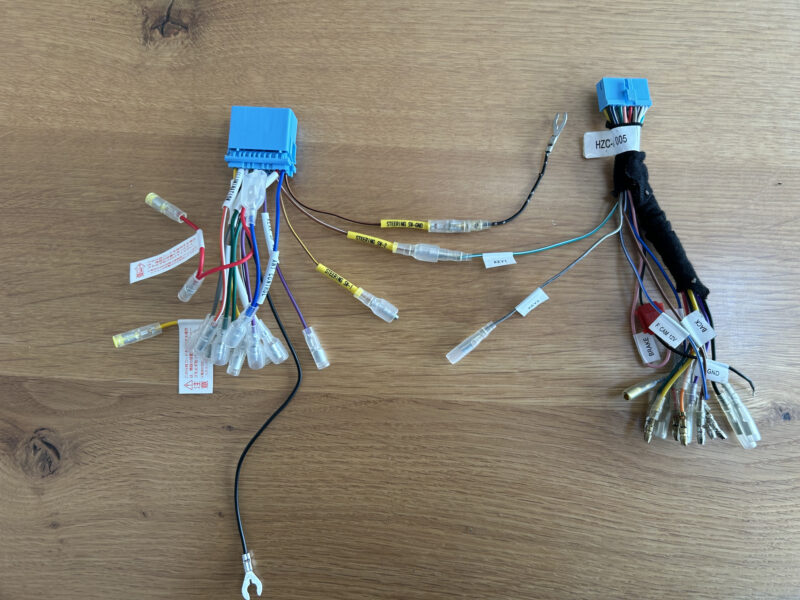
エーモン
配線図
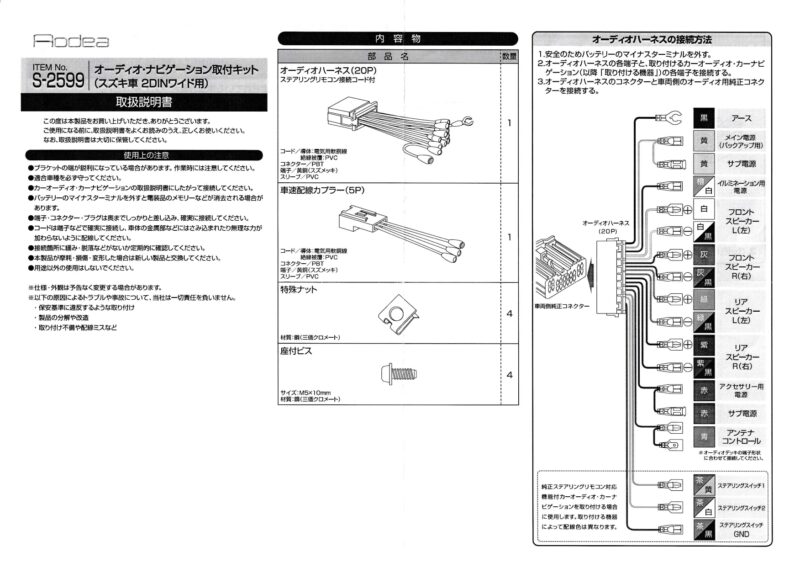
見やすくしました
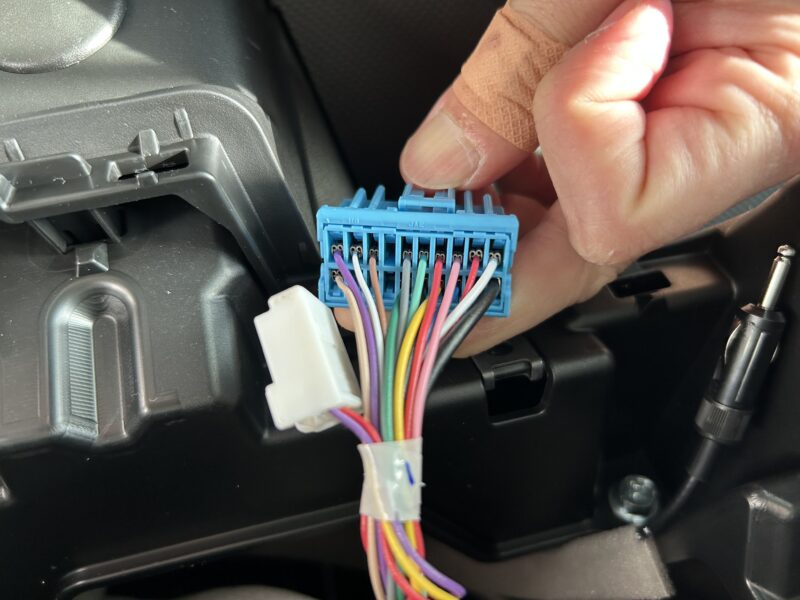
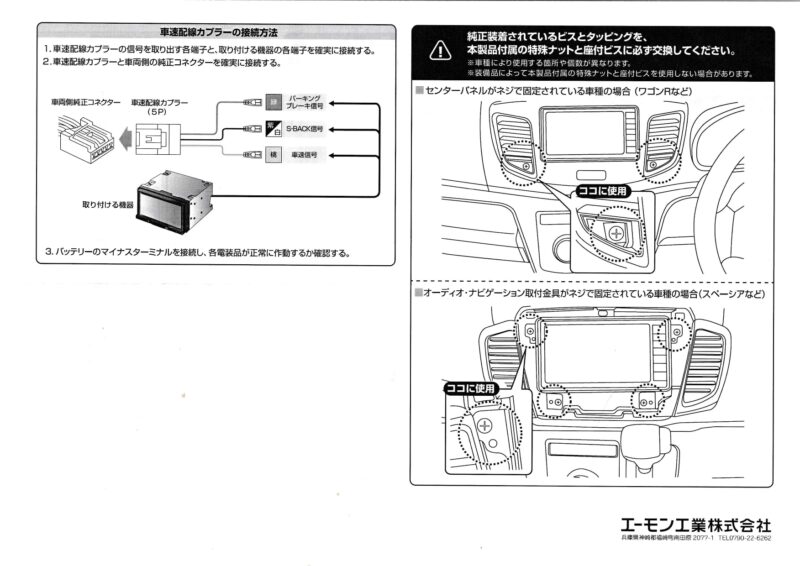
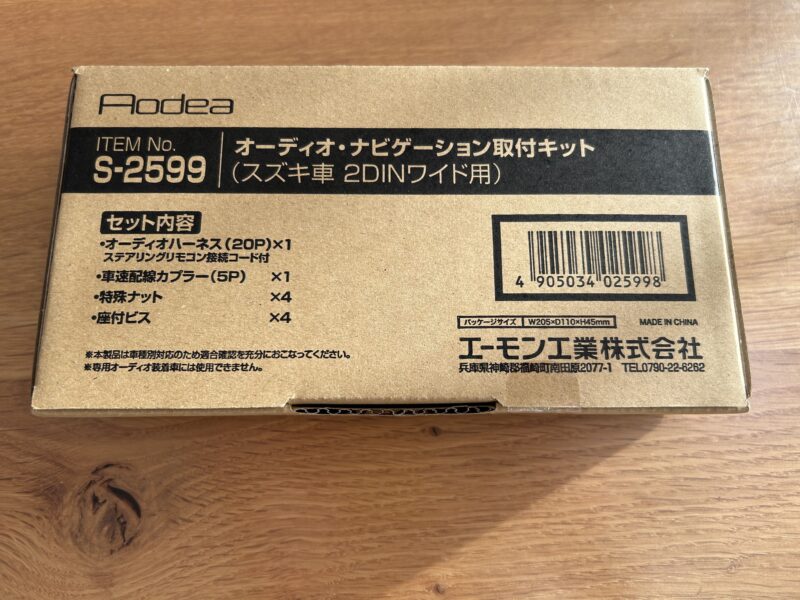
今回使用した製品
エーモン
オーディオ・ナビゲーション取り付けキット(スズキ車 2DINワイド用)
型番:S2599使用
セット内容
リンク
スペーシアカスタム

スペーシア
スペーシアカスタムDIYは、こちらから
まとめ
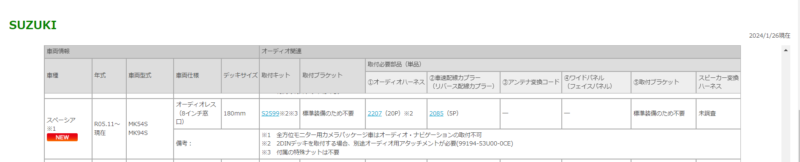
エーモンから出ている『車種別取り付け適合情報』には書いてありませんでしたが、配線のつなぎ方が少し違うみたいです。
でも、簡単に、ハーネスを付け替えると使用可能です。
nekoto私が調べた限りどのメーカーサイトにも載っていない情報ですので、あくまでも自己責任にて作業をお願いします。

コメント